Dragon Age: Origins

Dragon Age: Origins Introduction, Gameplay, and player screenshots.

Project Alpha: Steel Truss Diorama

First diorama project to create a maintenance bay.

Hobby Tools and Supplies

Project tools, equipments, construction supplies that i came across during gundam building and papercrafting.

Master Grade 1/100 GP01-Fb Fullburner Gundam

Straight build of Master Grade Gundam 1/100 GP01-Fb. Includes work-in-progress and final build.

Starting my own blog

Just a preview on what to expect from this blog. About the owner and contents of Veni Vedi Vici.

Showing posts with label Diorama. Show all posts

Nov 29, 2011

Project Beta - pt2

I've become very lazy in uploading work in progresses since i was busy building kits and diorama in preparation for GBWC 2011 here in the Philippines. Two weeks I was up for 48 hours straight working on my entry. Well better late than never, here is the continuation of Project Beta, this diorama was used for my first ever entry this year.

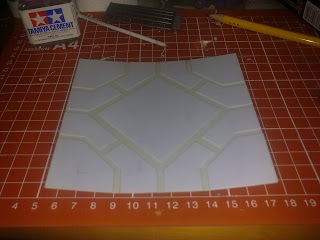
After building the base and trusses the next component of the dio was made, the platform for the Gundam to stand on. I measured 2 pla plates. One was cut into patterns.


Then the other one will be used to mount the cut patterns into the base as shown below.


The platform was mounted on the styro base ( i am very sorry i was not able to take a picture how i mounted it) by putting holes on the stryro base and placing plastic rods/sticks. This will be the support and mounting of the platform. It looks like this after mounting.

The styrofoam was covered with tissue and glue to ensure that the paint will adhere on the surface. All styro parts were masked with paper and masking tape. The trusses was painted with chrome and the pla plates was primed before painting. The rest of the dio was hand painted. Some details like a tree and light post were also added. This is the finished Project Beta enjoy ^_^


The metal trusses was given a rust effect and platform was given some scratch effect for it to look like it was weathered. This diorama was used for my GBWC 2011 PH entry with my HG 1/100 Nataku Assault Custom.

courtesy of Club-Gunpla Bandai South Asia

Thank you for viewing! ^_^

Project Beta - pt1

Nov 2, 2011

Project Beta

I have started on an new diorama project, this time i will be using other materials taking some inspiration from Project Alpha for the steel trusses. Initially I made a base made of Styrofoam that can be bought in bookstores. Size and width will depend on how sturdy the base should be considering the weight of the details, the kit and any other add-ons.

Actual base 12 in X 12 in X 2 in
A metal truss was also added, the procedure in making the truss was the same method used in Project Alpha. A styro base was also used to elevate and mount the truss into place.


Another metal truss was mounted on a slanted slab and was cut. This will be the "unfinished truss"


Basically the design of the diorama will be a combination of metal and earth. The styro base will serve as the "earth" and the steel trusses for the :"metal". But to give the dio a more metal feel and to add texture. There is a provision for a metal base/platform. These will be created using pla plates. And will be discussed on the next post.

Thanks for viewing! ^_^

Project Beta - pt2

Aug 19, 2011

Project Alpha - pt3

I've been doing a lot of other stuffs lately so the progress has really slowed down. So here are the next steps.

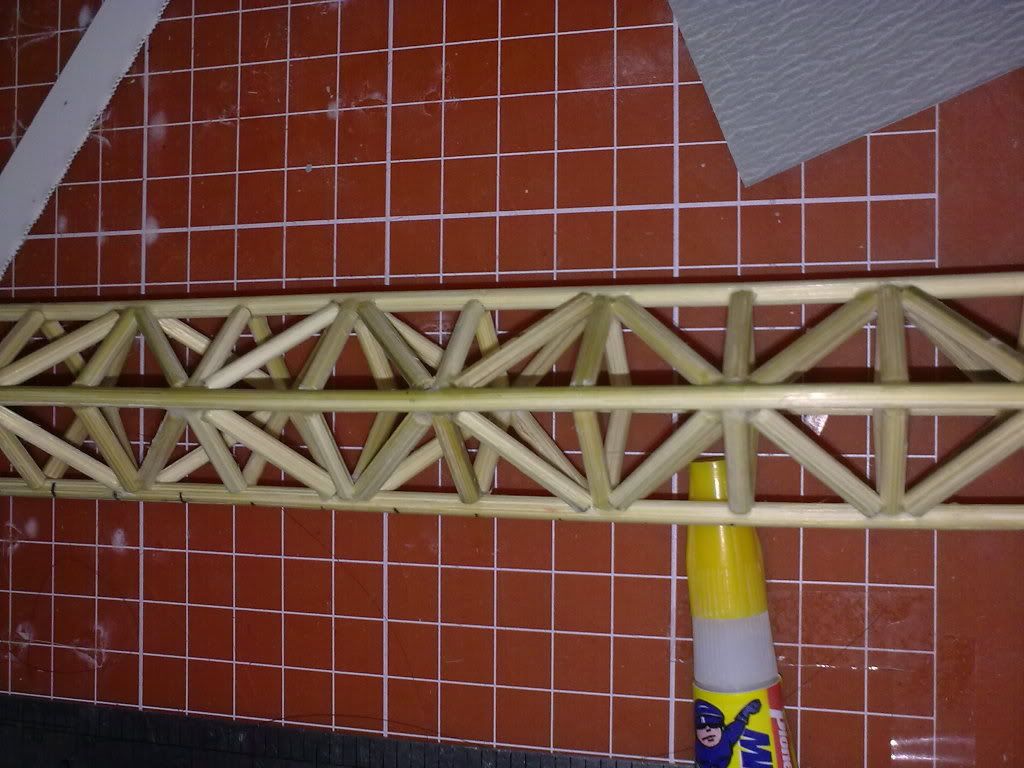
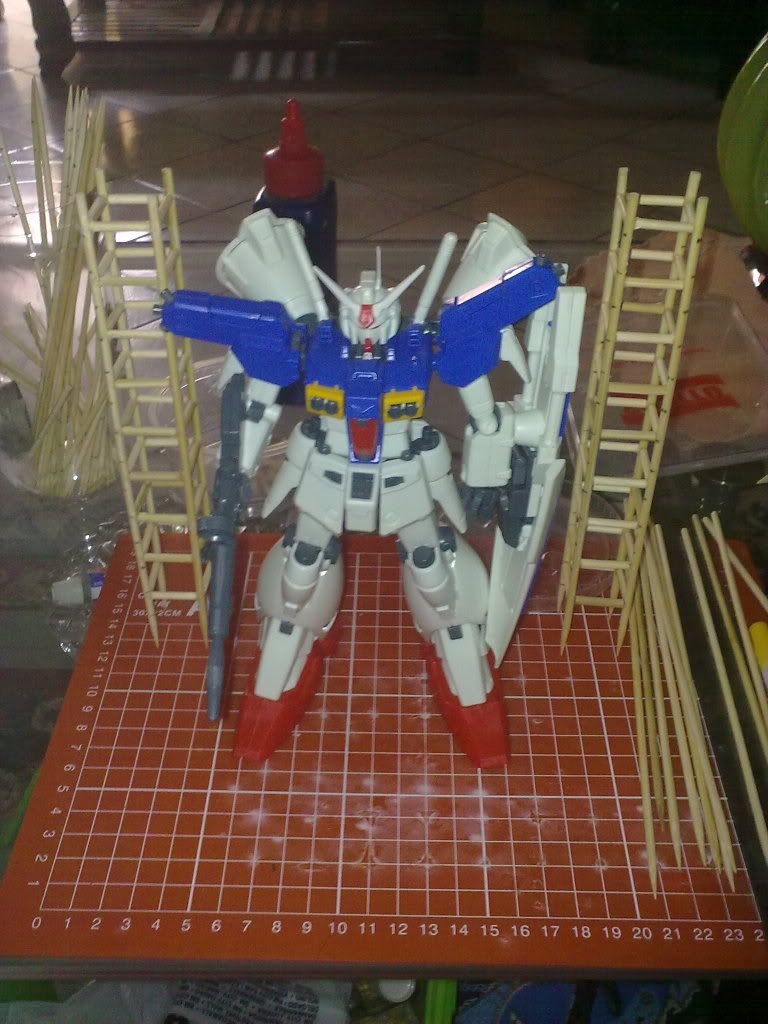
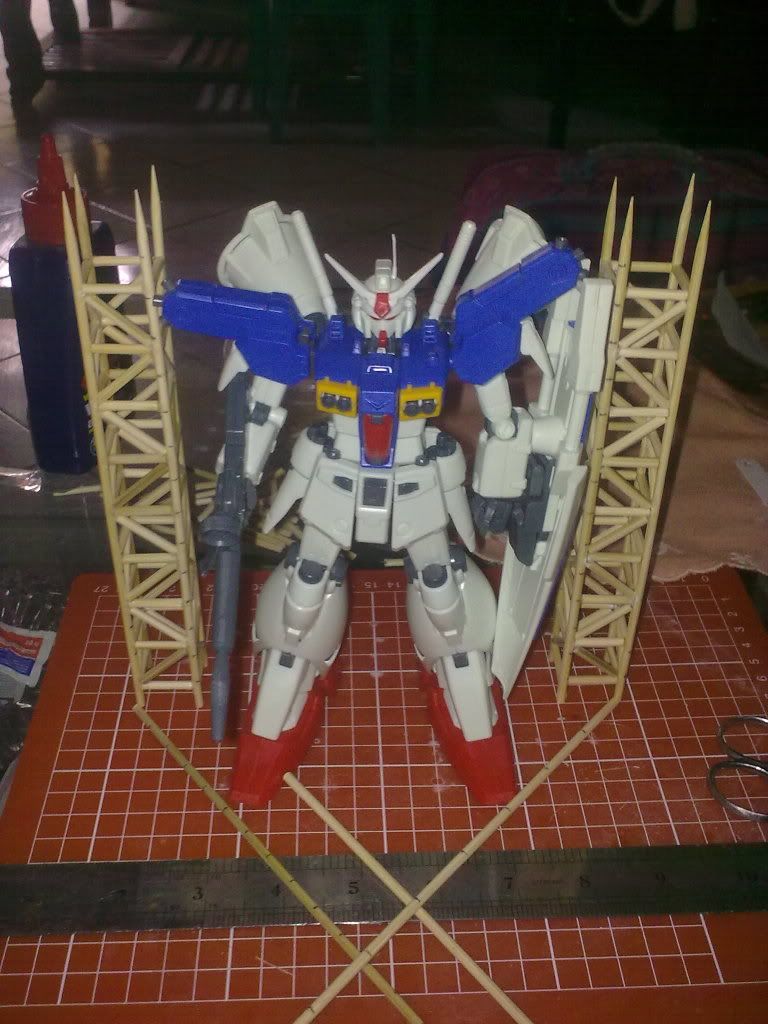
After creating the main body of the truss, diagonal pegs were added.


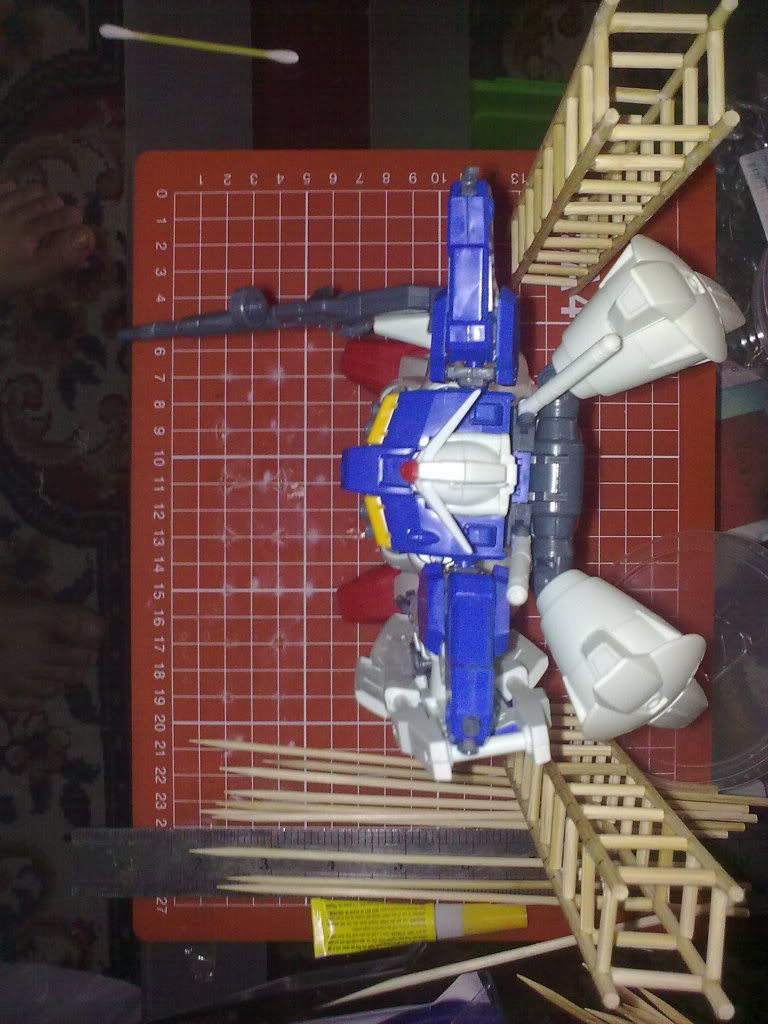
Once the main beams of the diorama are completed, its time to do some trials. I used my MG 1/100 GP01-fb full burner gundam for this.


The vertical beams are almost of the same height as the kit, so I consider this as good since the dio will still have a base. 
 
There is a provision to add diagonal trusses in which I was trying to layout on during this trial. The same process was done in creating the pegs. But it is more tedious that the vertical ones.


The completion of this project is around 5-10%. On my next post i will be sharing the sketch of this project. The metal truss will also be used on my 2nd project which i will also use a different construction material.

Thanks for viewing!

Jul 12, 2011

Project Alpha - pt2

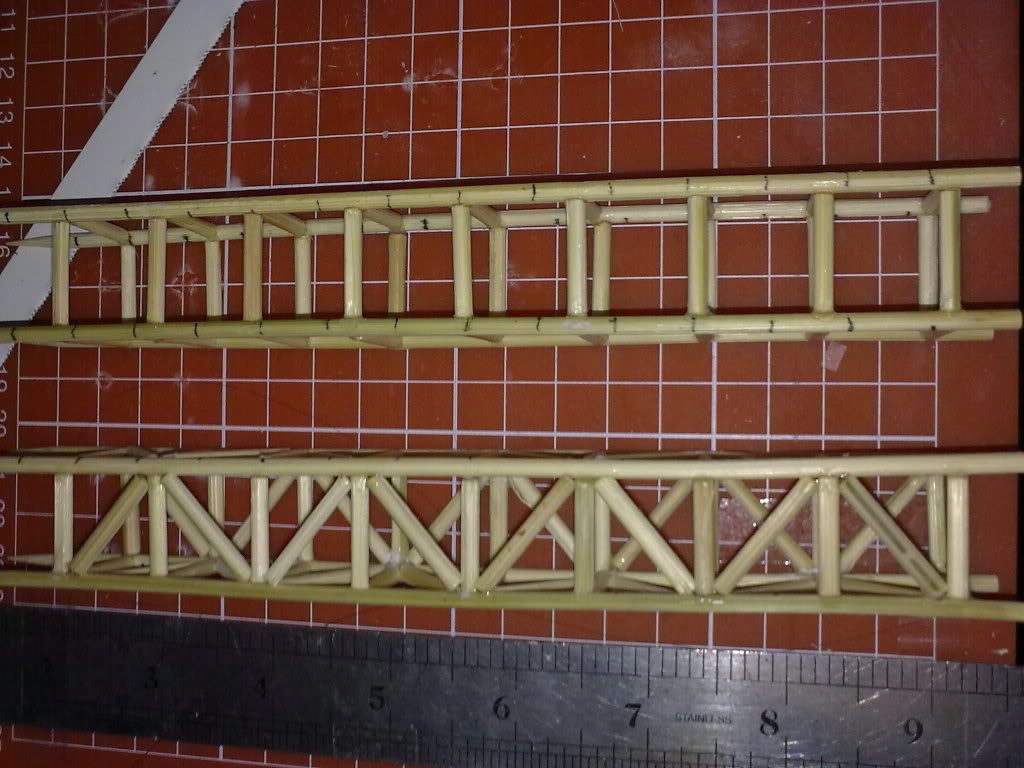
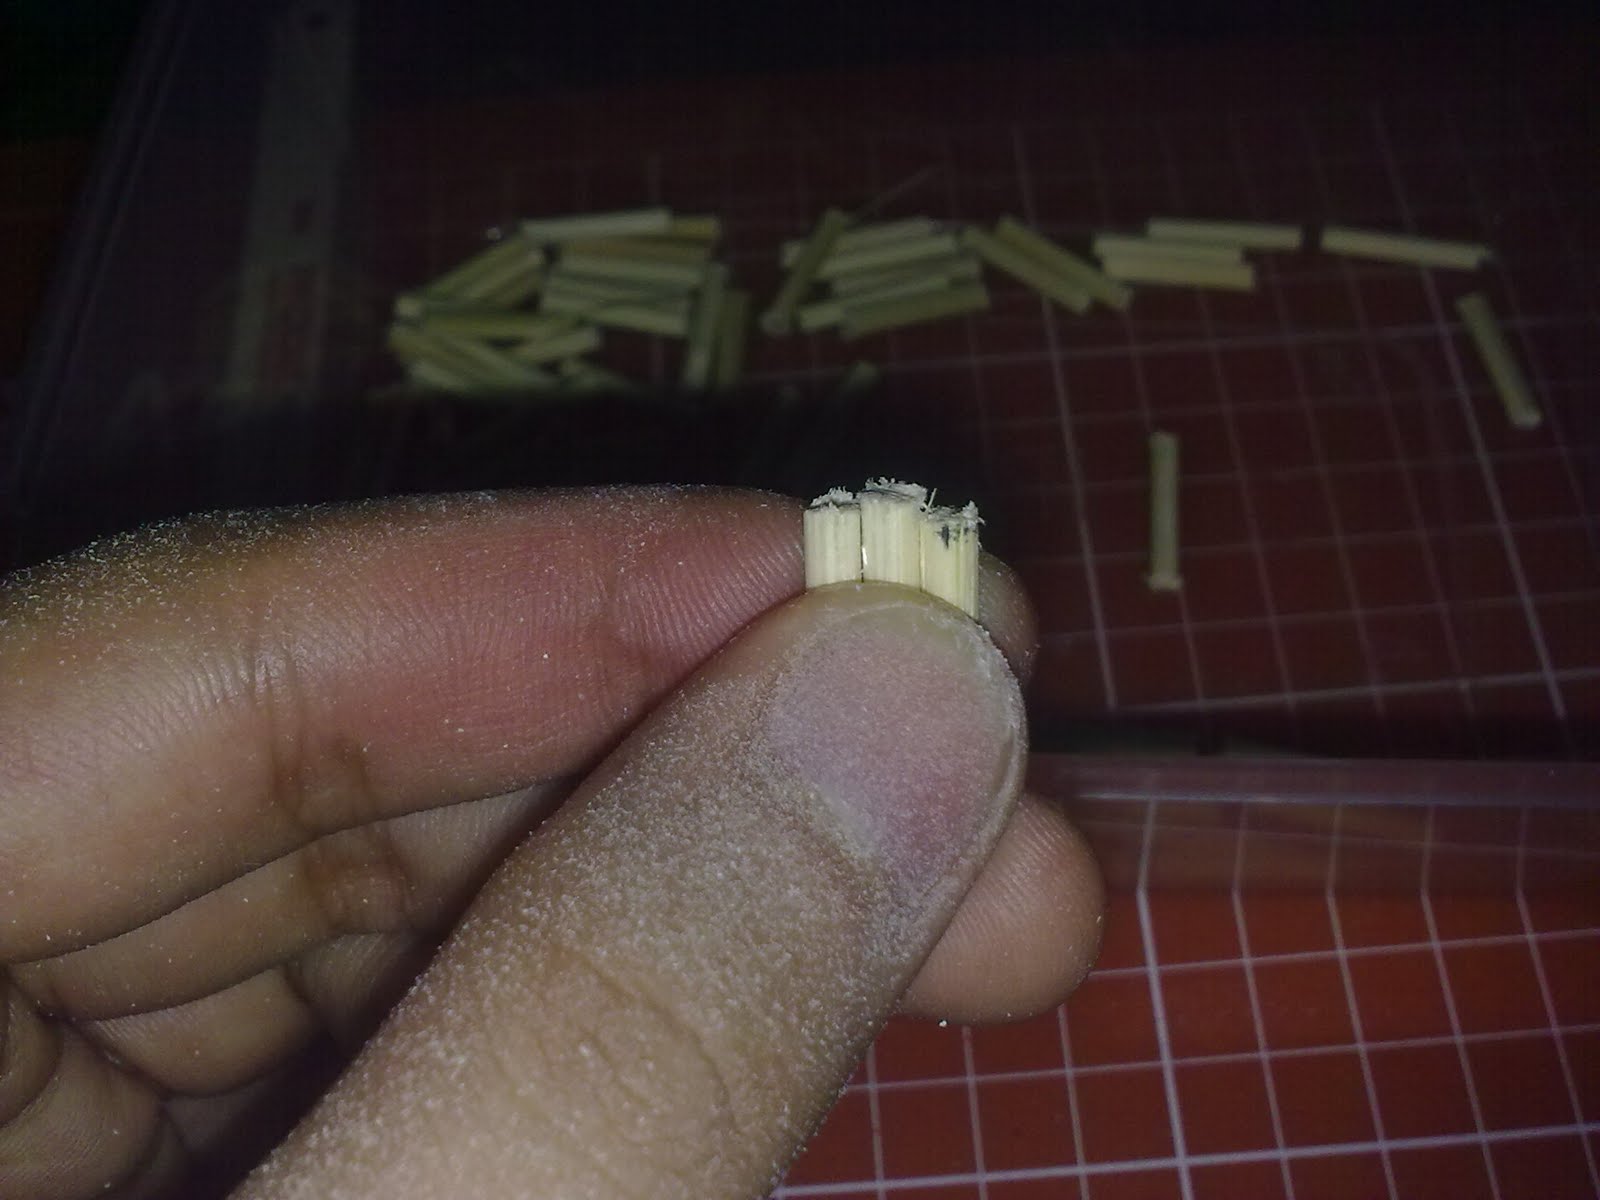
After measuring and cutting the horizontal and vertical pegs. The cut pegs must undergo pre-evaluation
 Since nobody is perfect there would be pegs that are a few millimeters smaller caused by variations in measuring and cutting. This would cause uneven alignment on the final product if used.

As a remedy those that are a bit larger were filed down to size.

Once uniform, all the pegs can now be glued and assembled together. But first the main beams must be set-up to ensure there will be no movements during the assembly phase. This was done by taping the ends of the main beams against the working mat and a ruler.
The pegs are glued one by one. Using tweezers to attach each and gluing it using a quick dry industrial glue (mighty bond).

Make two of this and combine it, complete the horizontal pegs to form the truss beam! You can add diagonal pegs to complete the truss beam.

Thanks for viewing.


Jul 3, 2011

Project Alpha

Well this is my first attempt to create a diorama. Thanks for the help of a fellow modeler Edward Panaligan (I keep giving him credits because he deserves it!). I called it project alpha because it is my first diorama. :)

The diorama will be made up of trusses. The one that I will be making is the flat truss type.
I will be making one using barbecue sticks!
make some measurements of the "pegs" for both horizontal and diagonal
Since i am still undecided on what will be the final design of the diorama i measured a lot of pegs.

After measuring, the sticks can now be cut, i used a metal saw for this. There are other alternatives that can be used to cut the sticks.

to be continued....

Twitter Delicious Facebook Digg Stumbleupon Favorites More